Seedlings are the infant plants of the world! They’re fantastic, easy to care for and very manageable once you know the steps you need to guarantee the full health of your baby seedlings. Seedlings come in many different types and demand the right amount of light, water and soil to mature from infancy over the long term. That's why in this simple guide we’re going to cover everything you need to know to keep all your little leaf’s thriving all year long.
So let's walk through it!
Let’s start with the different types of seedlings you need to know about before diving into seedling care.
Vegetable seedlingsLettuce, Tomato, and pepper seedlings are the most common vegetable seedlings that are beginner-friendly and easy to care for. Vegetable seedlings want a lot of light exposure as they require around 14 - 16 hours, which is why most green thumb gurus say to Invest in a long-lasting and energy-efficient grow light to set your seedlings up to thrive.
Succulent seedlingsSucculents such as cacti or aloe vera typically need less intense light than vegetable seedlings, however, succulents still require about 10 – 14 of light per day to sustain a healthy and balanced lifestyle. That’s why It’s advised to have a suitable lighting system set up, to help supplement their long-term happiness and health.
Flower seedlingsMarigolds, petunias, and sunflowers are part of the flower seedlings gang and similar to veggies require 12- 16 hours of light daily, if you worry about your seedlings not receiving enough light, adding grow lights to nurture your flower seedlings' growth is an easy solution when the duration of natural sunlight in your area is low.

The distance between your grow lights and seedlings is a key factor in ensuring your little green friends get just the right amount of light without any harm. It can vary depending on the type of grow light you are using and the type of seedlings you’re growing.
Fluorescent Grow Lights (T5 or T8 bulbs): These are cooler than LEDs and can be placed closer to the seedlings, usually around 3-12 inches above the plants. Fluorescents are great for seedlings because they provide good light intensity without too much heat.
High-Intensity Discharge (HID) Lights: These lights, including Metal Halide (MH) and High-Pressure Sodium (HPS) lamps, produce a lot of heat. Therefore, they should be placed further away from the seedlings, generally around 24-36 inches, to prevent heat damage.
LED Grow Lights: These are increasingly popular due to their efficiency and lower heat output. For seedlings, LED lights should generally be positioned about 12-24 inches above the plant canopy. However, since LEDs vary in strength, it's a good idea to start on the higher end and observe how your seedlings respond, adjusting as necessary.
Your choice of grow light depends on your needs, but generally, LEDs are better as they outperform in quality, cost, and efficiency compared to types of grow lights… there also really easy to use for beginners.
Key tip:
- Start Higher, Then Adjust: It's often better to start with your lights a bit higher than you think you need and then gradually lower them as needed. This helps prevent accidentally burning your seedlings.
- Watch Your Seedlings' Reaction: Seedlings that are getting too much light may look bleached or begin to wilt, while those not getting enough light will become leggy and weak as they stretch towards the light source.
- Use a Thermometer: Monitor the temperature around your seedlings, especially if using HID lights, to ensure it's not getting too hot.
- Rotate Your Plants: This ensures all sides of the seedlings get even light, promoting uniform growth.
- Consider the Type of Plant: Different plants have different light requirements. Leafy greens and herbs can usually handle being closer to the light, while more delicate seedlings might need a bit more distance.
Remember, the goal is to mimic the natural sunlight as closely as possible in terms of intensity and duration. Adjusting the height of your grow lights are a part of this process, helping you provide the ideal conditions for your seedlings to bloom with brilliance.

So… you want to know the best way to water your seedling, gotcha, watering is a very important part of plant care, especially for seedlings who require extra care and love to thrive in their infant stages of growth.
Here’s how you can water your seedlings effectively:
- Choose the Right Watering Can: For seedlings, a watering can with a long spout and a rose (the sprinkle head) is ideal. This design allows for gentle watering that won’t disturb the delicate seedlings. The rose should have fine holes for a soft, rain-like sprinkle.
- Use Room Temperature Water: Cold water can shock the tender roots of your seedlings. Use room-temperature water to keep them comfy and happy.
- Water from Below (Bottom Watering): This is a great technique for seedlings. Simply fill a tray with water and set your seedling containers in it. Allow the soil to absorb water through the drainage holes. This encourages the roots to grow downwards and helps prevent overwatering.
- If Watering from Above: Gently sprinkle water over the soil using your watering can. Aim to wet the soil, not the plant leaves, to reduce the risk of disease. The long spout of your watering can help you control the water flow and target the soil directly.
- Avoid Overhead Watering in the Evening: If you must water from above, do it in the morning. This gives the leaves time to dry out during the day, reducing the risk of fungal diseases.
- Adjust Watering as Seedlings Grow: As your seedlings get bigger, they’ll need more water. Keep an eye on their growth and adjust your watering accordingly.
- Use a Watering Schedule: While seedlings don’t like to dry out, they also don’t need to be watered every day. A schedule can help you keep track and ensure you’re providing the right amount of water.
- Be Gentle: Seedlings are delicate. A gentle touch with your watering can ensure they aren’t disturbed or damaged which could lead to root rot during the watering experience.
Soil for seedlings
Onto the exciting game of soil selection! Choosing the right soil for your seedlings is like picking the perfect bed for a newborn – it's crucial for their health and growth! Different types of soil cater to the unique needs of young plants, ensuring they get the best start in life. Let's dig into some of the best soil types for seedlings.
Note: The optimal soil conditions can be supplemented by using a source of good light and with consistent moisture from water, with this in mind what type of soil should you look for and consider when enhancing seedling health with soil?
Well, a good starting place is the seed starting mix you choose, a lightweight concoction made from peat moss, vermiculite, and perlite is optimal for offering excellent draining and air circulation, key for tender roots. For an eco-friendlier option, consider a peat-free mix, often made with renewable coir, Alternatively, a high-quality, lightweight potting mix can suffice, especially if labelled as suitable for seedlings.
The adventurous gardener might even explore creating their mix, combining equal parts peat or coir with vermiculite or perlite, and maybe a touch of compost for a nutrient boost. Overall, it’s best to go for something light and fluffy to ensure your roots get the best chance of spreading across the soil and avoiding soggy conditions, this will set the the perfect stage for your seedlings to thrive.
Nutrients for Seedlings
Think of it as a balanced diet for young plants. Providing the right nutrients at the right time is essential for nurturing your baby seedlings. Once your seedlings start to germinate and develop true leaves (leaves that sprout after seed leaves appear), it's time to consider nutrient supply. Look for nutrients containing nitrogen, phosphorus, and potassium, often labelled N-P-K.
Apply a diluted nutrient solution once every week or two. As your seedlings grow, you can increase the frequency.
Bonus tip: add nutrients to your regular watering routine to ensure even distribution and avoid root burn.

Transplanting
Now… time for graduation. Often overlooked, transplanting is an essential aspect to the healthy development of your beloved seedlings.
Transplanting occurs when your babies start to outgrow their initial containers, signalling it’s time to move to a new home for a new chapter of growth. So how do we properly transplant our seedlings for the best transitioning?
To make this simple, we’ve listed 7 steps for the most effective transplanting routine:
1) First things first – ensure this is the right timing for transplanting, you can tell if your seedlings are ready if they have several true leaves and have outgrown their current space.
2) Get ready – before moving your seedlings, prepare their next home. Be it a new and larger pot or a special space in your garden. Also, ensure the soil is well-tinted, nutrient-rich, and moist.
3) The night before – Water your seedlings the night before transplanting. This helps reduce the chance of root damage while transitioning.
4) Gentle handling – Handle your seedlings with care, and be gentle in your approach to supporting the roots, avoid touching the stem and roots as much as possible as they are in a delicate state.
5) Placing – In their new home, make a large hole enough to accommodate the root ball. Ensuring it’s at the same depth as their last home. Then cover them up with soil and press down lightly to remove air pockets.
6) Aftercare – Water the seedlings after transplanting to help settle the soil. At the beginning of its new arrival ensure to keep a gentle eye on them as they settle in and protect them from heavy sunlight exposure or rain to set your seedlings up for success.
7) Monitor – You're almost done, now all you have to do is to monitor your plants for signs of stress and adjust accordingly if you notice any major issues.
Congrats! That’s it you now know the 7 steps to transplant your seedlings effectively. With time your leafy friends will adapt and continue their growth in fine fashion.
Conclusion
Seedlings are the babies of the plant world and desire a lot of care and nurture to thrive in their infancy stages. In this simple guide, we have covered everything you need to know from the correct distance to keep your grow lights from your baby seedlings to the transplanting process and everything beautifully in between. Before you set off to grow your own seedlings and propel your gracious garden to a new level, here is a list of main takeaways, your seedlings need to live healthy and happy.-
Distancing for your seedlings – position your grow light 12- 24 inches away, specifically LEDs for optimal care. Keep an eye on the health of your plants and adjust the distance when necessary.
-
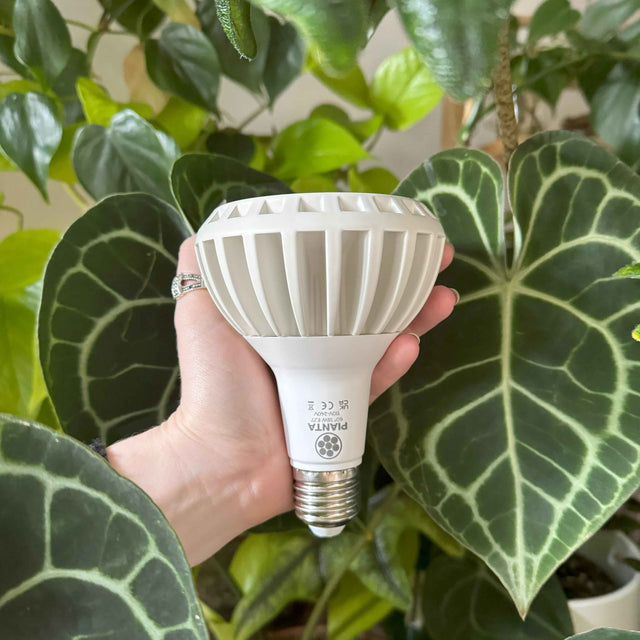
Lighting for your seedlings – LEDs are effective, beginner-friendly grow lights for seedling care as they emit the right amount of light intensity for baby seedling nourishment, care, and growth. We Recommend the Pianta light.
-
Soil for your seedlings – your choice of soil, varies on your specific preference. For an easy and beginner-friendly option, choose a lightweight concoction made from eco-friendly peat-free ingredients. We recommend Soil Ninja for their high quality soil blends.
-
Watering for your seedlings – using a watering can with low-temperature water, you can’t go wrong with a bottom watering. See here for a more in-depth guide.
Find similar articles:
Indoor GardeningMentioned in this article
More stories